What You Have to Contemplate a Plumber for Install Your Dishwasher

Call Today

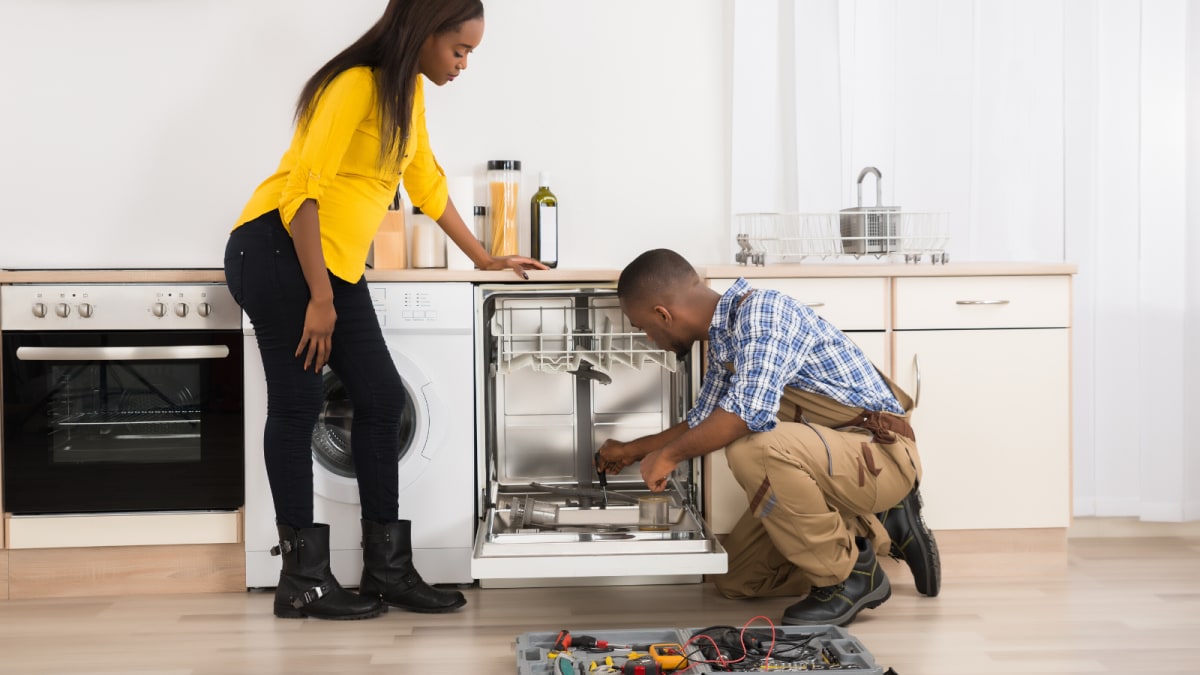
From hauling a dish washer right into your residence to connecting the water links, installing a dishwasher can take up to five hrs. A plumber will certainly have the right tools on hand as well as can install your new dish washer in under 2 hrs.


Not Installing Your Dishwashing Machine Appropriately Can Cause a Mountain of Troubles


Not only can mounting a dishwashing machine appropriately invalidate your warranty, but it can also create a mess. If you incorrectly install your dishwasher to the waste disposal, you might discover pungent smells or have deposit on your meals.


An Improper Installation Can Invalidate the Dishwasher's Warranty


Prior to mounting a dishwashing machine on your own, you should check out the service warranty carefully. Also a little damaging the dishwasher throughout the installment procedure can nullify the warranty. Because the expense of a dishwashing machine ranges between $300 to $1,000 as well as upwards, that can be a pricey blunder. Even if the dishwasher still functions, you will certainly not have the ability to change it needs to it break quickly. So, unless you are handy and have experience setting up dish washers, you need to hire a plumber so you don't risk your warranty.


Mounting a Dishwashing Machine Requires a Variety of Devices


You may need to make a trip to Lowe's or House Depot if you do not have a range of tools on hand. To mount a dishwashing machine, you require the following devices: pliers, an adjustable wrench, a set of screwdrivers, a tube cutter, and also opening saws. You will likewise require cleansing supplies such as a shallow pail and also sponge. The expense to buy them can include up promptly if you do not have any of these things.


A Plumber Can Inspect the Supply Lines


A supply line, particularly a dishwasher port, connects the dishwasher to a water resource. A plumber can make certain that the line is suitable with both your dishwasher and water resource if you purchase a new supply line. An expert plumber can examine it to make certain that it's in good condition and also does not have any type of leakages if you determine to use an existing supply line.


A Plumber Can Complete the Task Affordably and also Promptly


A plumber can mount your dishwasher in one to 2 hrs. The ordinary plumber will not bill even more than a couple of hundred dollars to install your dishwashing machine.
From transporting a dish washer right into your house to connecting the water connections, setting up a dish washer can take up to five hours. To make your life less complicated and also to stay clear of setting up a dishwasher incorrectly, we recommend employing a specialist plumber. A plumber will certainly have the right tools on hand and can install your brand-new dishwashing machine in under 2 hours. Unless you are helpful as well as have experience setting up dishwashing machines, you ought to work with a plumber so you do not risk your service warranty.
A supply line, especially a dish washer adapter, attaches the dishwashing machine to a water resource.


How To Install A Dishwasher


Installing A Dishwasher Yourself


Just like other home appliances, a dishwasher helps to make chores less time-consuming and free of hassle. Most modern kitchens have a dishwasher or a cabinet space for dishwasher installation built into them. An older kitchen with no dishwasher or cabinet space for one might require a little reconstruction to accommodate dishwasher installation.


Installing a dishwasher requires basic knowledge of plumbing and electrical wiring. This article contains the steps involved in dishwasher installation, dishwasher installation tips, things to consider when installing a dishwasher in a kitchen that previously had no dishwasher in it, and tips for maintaining a dishwasher.


Steps Involved In Dishwasher Installation


Step One: Gather the Necessary Supplies


Gather all the required items and keep them near the installation site for easy reach. The materials and tools you will require include the following:

 
  • A screwdriver

  • • A hose clamp

  • • Duct tape (optional)

  • • A brass fitting

  • • Teflon tape

  • • A pair of pliers

  • • An adjustable wrench

  • • A drill

  • • Braided steel water line

  • • A pair of rubber hand gloves (optional)

  • • Wire nuts

  •  

Step Two: Take Safety Measures


First, turn off the power socket and unplug the power cord if it is a plug-in dishwasher. Then, proceed to turn off the circuit breaker. Next, turn off the hot water shut-off valve under the kitchen sink and run the tap to ensure the water supply is shut off. Protect your kitchen floor close to the installation area with an old rug or a piece of drop cloth.


Step Three: Remove the Old Dishwasher


This step only applies if your kitchen has an old dishwasher that you want to replace. Remove the cabinet door to gain complete access to the old dishwasher. Next, remove the cover of the access panel located at the bottom front side of the dishwasher. Locate the junction box inside the access panel.


Now, unscrew the terminal screws holding the wires in place at the junction box. Then, remove and tuck the wires out of the way with duct tape. Locate the dishwasher water inlet tube, undo the brass fitting and disconnect the water supply pipe from it. Put the disconnected end of the water supply line pipe into a bucket or bowl to collect any water remaining in it.


Reach down beneath the sink to undo the drain hose. Loosen, then clamp and disconnect the drain hose of the dishwasher from the tailpiece of the sink. Next, put the disconnected end of the drain hose into a bucket to collect the water and debris.


With all the connections out of place, remove the screws holding the dishwasher in place with a screwdriver, gently pull the dishwasher out from the cabinet and set it aside. You can use a piece of cloth or towel to clean up the mess made or any water spillage on the floor. Also, clean the cabinet where the old dishwasher was before installing a new one.


Skip this step if you are having a dishwasher installed for the first time in your kitchen.


Step Four: Install the New Dishwasher


Connect the Water Supply


Wrap Teflon tape on the tip of the water inlet pipe located at the bottom of the dishwasher. Screw on the 90 degrees brass fitting to the taped inlet pipe and tighten it with an adjustable wrench. Most dishwasher units do not include a brass fitting, but they are available at hardware stores.


Once you have the fitting, connect the new water supply line to the elbow of the brass fitting. Pass the other end of the waterline through one of the cabinet holes and place it on the floor beneath the kitchen sink.


Attach the Drain Line


Locate the dishwasher drain standout pipe, connect the drain line to the dishwasher, and secure the connection with a hose clamp. Pass the other end of the drain line through the cabinet hole and place it towards the sink drain tailpiece


Slide the Dishwasher into Place


Attach the adjustable legs to the front of the dishwasher. Carefully slide the dishwasher under the countertop into the cabinet. Stop halfway and ensure everything is in a good position before sliding it in completely. Finish hooking up the water line by connecting the other end to the dual shut-off valve located under the kitchen sink.


Proceed to connect the drain hose through an air gap to your garbage disposer, if you have any, or to the drain tailpiece of your sink. If you do not have an air gap, make a high loop with the drain hose before connecting it to the garbage disposal or the sink drain tailpiece.

https://www.movementplumbing.com/blog/how-to-install-a-dishwasher


How to install a dishwasher safely
Click Here

Detailed Guide to Resolving a Leaky Tap: Skilled Advice

Call


Have you been searching for info on How to fix a leaky tap and save water?


How to Fix a Leaking Tap Without Getting Professional Help


Introduction


A leaking faucet is not only bothersome however can likewise throw away a substantial quantity of water and cause increased utility bills. In this step-by-step overview, we'll walk you with the process of dealing with a leaky faucet, permitting you to conserve water and cash while maintaining your plumbing system.


Gathering Tools and Materials


Before you begin, gather the necessary tools and products for the fixing. You'll commonly need an adjustable wrench, screwdrivers, replacement washers or seals, plumber's tape, and a rag or towel to tidy up any kind of spills.


Shutting Down Water


Situate the shut-off shutoff for the influenced faucet and transform it clockwise to turn off the water system. If you're not able to locate the shut-off shutoff, you might require to turn off the primary supply of water to your home.


Taking apart the Tap


Use a screwdriver to get rid of the deal with of the tap, exposing the inner parts. Depending upon the kind of tap, you might require to unscrew a cap or collar to access the shutoff setting up.


Examining for Damage


As soon as you have actually subjected the valve setting up, check it for any type of indicators of damage or wear. Common wrongdoers of a dripping tap consist of damaged washers, O-rings, or seals.


Changing Faulty Parts


If you identify any type of damaged or damaged elements, carefully eliminate them utilizing a wrench or pliers and change them with new ones. Be sure to make use of the appropriate dimension and kind of replacement components for your tap.


Rebuilding the Tap


After changing the defective components, thoroughly rebuild the tap in the reverse order of disassembly. Make certain that all parts are properly lined up and tightened to avoid future leakages.


Evaluating for Leakages


Once the tap is rebuilded, turn the water back on and evaluate the faucet for leaks. If you observe any leaks, ascertain the connections and tighten them as needed.


Ensuring Correct Performance


After validating that the tap is leak-free, test its functionality by transforming it on and off several times. Make certain that the tap operates smoothly and with no unusual noises or resistance.


Tidying up


Ultimately, tidy up any kind of particles or spills from the fixing procedure and throw away any kind of old or damaged parts effectively. Leaving the work area spick-and-span ensures a specialist finish to your repair service.


Conclusion


Dealing with a leaky tap is a relatively basic DIY job that can conserve you money on water expenses and avoid more damage to your plumbing system. By following this detailed overview, you can tackle the fixing with self-confidence and appreciate the benefits of a leak-free faucet.


HOW TO FIX A LEAKY TAP IN 5 EASY STEPS


CUTTING OFF THE WATER SUPPLY TO THE TAP


Before replacing your dripping faucet, you may want to start by shutting off the water supply to the fixture. After all, you can’t exactly work on the tap if it constantly sprays water everywhere.


To do so, look for a knob underneath the sink and turn it clockwise. After this, turn the faucet on to let out any water remaining in the water supply line.


If the water doesn’t shut off even after turning the knobs, you can shut off the entire house’s water supply.


WHAT YOU’LL NEED TO FIX A LEAKY COMPRESSION FAUCET

 
  • Flat head screwdriver

  • Toothless Plumbing wrench

  • Towel

  • O-ring

  • Hex wrench

  • Faucet washer

  •  

5 STEPS TO FIX A LEAKY COMPRESSION TAP


Rubber washers are used in compression faucets to tighten the valve seat. Think of it as a mechanism similar to a plastic bottle cap.


These faucets often leak when the rubber washer is sufficiently worn down. So, when you turn off a dripping faucet, it never cuts off the water supply entirely. This means that the problem lies with the washer itself, and replacing it would fix the water leakage.


TAKE OFF THE CAP FROM FAUCET HANDLES


First, you will have to remove the cap present on top of each faucet handle to access the inner working parts of the faucet. Lift the decorative cap using a flathead screwdriver, underneath which you will find a screw head.


Place the decorative cap close by and proceed to the next step.


REMOVE THE TAP HANDLES


Next, depending on the screw type, you can use a flathead or a hex screwdriver to loosen the exposed screw head. Doing so will loosen the faucet handles, allowing you to remove the handles entirely.


If the handles don’t loosen, penetrating oil may help you remove them relatively quickly.


REMOVE THE STEM AND ACCESS THE O-RING


Compression faucets usually have the valve stem and the nut that keeps them in place below the handles. You can use an ordinary wrench to remove the stem nut, pulling the stem out and accessing the O-ring.


Note that wrenches can easily damage the stem nut, so use a toothless wrench for the best results.


Once the stem is out, you will find the seat washer and the O-ring. This ring also keeps the faucet from leaking constantly; if it is worn out, you may need to replace it.


REPLACE THE SEAT WASHER


Seat washers are meant to compress when you turn the handles, which shuts off the water flow through the faucet. If your seat washers are worn out or damaged, you must replace them.


The seat washer may be affixed to the faucet by a screw, which you must unscrew before removing the ring. If it is an Allen screw holding the washer, use an Allen wrench to remove it.


Once the screw is out, remove the rubber seats and place a new one.


FAUCET REASSEMBLY AND TESTING


Now that the component responsible for the leaks has been taken care of, you can reassemble the faucet. Follow the disassembly guide detailed above in reverse for this.


Once reassembled, it’s time to test the fixed faucet. Open the shutoff valves under your sink (or the main water supply) and turn the tap on. If water flows through the faucet after letting some air out, consider it a job well done!


REMOVE THE FAUCET HANDLE


Disassembling a washerless faucet is similar to compression faucets. You may remove the handle using the process detailed above.


REMOVE THE INTERNAL COMPONENTS


Depending on the faucet type, you must follow a slightly different way of disassembling the faucet body.


You must remove the small circular piece to find the cartridge using needle-nose pliers for a cartridge-style faucet. This piece is known as a retaining clip, and you must not damage it.


As for a ball-type faucet, use a toothless wrench to remove the cap and collar. After this, remove the cam washer, faucet cam and ball to find the seal and springs underneath.


Lastly, a ceramic disk faucet requires removing the escutcheon cap to access the disk cylinder. Underneath this cylinder is a neoprene seal responsible for controlling the water flow.


EXAMINE THE PARTS AND REPLACE AS NECESSARY


At this point, you may have found the O-ring in a cartridge faucet. Take the cartridge from the tap and cut off the O-ring using a utility knife. After this, you can replace the ring with one coated in the plumber’s grease. If the damage is extensive, consider replacing the entire cartridge.


When dealing with a ball faucet, you can install new springs, cam washers and valve seats to fix the leak. Ensure that the replacement parts are compatible with your faucet type.


Lastly, replace the neoprene seals under the cylinder for ceramic disk-type faucets. Like with ball faucets, you should ensure the new parts are compatible with the tap. Consider replacing the entire cylinder if the damage to it is extensive enough.


REASSEMBLE AND TEST YOUR FAUCET


Now that all the fixes are made, carefully reassemble the faucet and turn the water supply back on. Test the faucet for any signs of leaks or faults; if there are none, you’re done with the task!

https://woolfplumbing.com.au/blog/how-to-fix-a-leaky-tap-in-5-easy-steps


How to fix a leaky tap and save water


I recently found that article on How-To Guide On Fixing A Leaking Tap Or Faucet Step while looking around the search engines. Sharing is nice. You won't know, you may very well be doing someone a favor. Many thanks for going through it.


Schedule An Appointment

1 2 3 4 5 6 7 8 9 10 11 12 13 14 15